

What Actually Happens During a Home Extension Project?
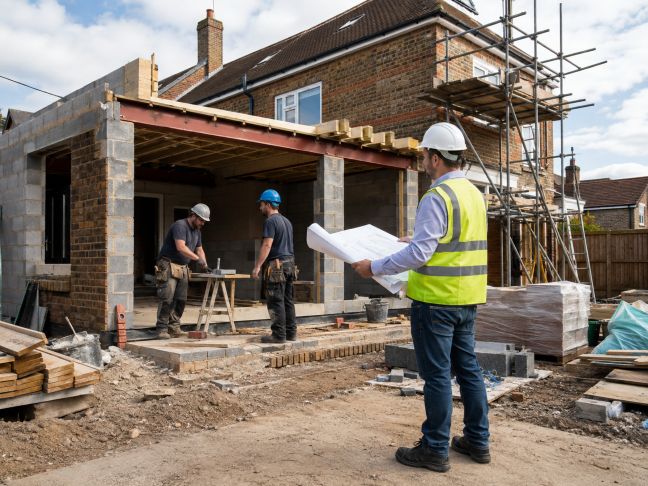
A home extension usually moves through linked stages, from feasibility and design to approvals, construction, inspection, and handover. The Royal Institute of British Architects sets out a similar sequence in its RIBA Plan of Work.
For homeowners, the first step is deciding what the new space needs to achieve and whether the property can support it. Speaking early with architects, engineers, contractors, or extension builders in North London can reveal limits involving access, structure, drainage, neighbours, and budget.
Step 1: Define the Brief and Test Feasibility
Start with the problem the extension should solve. It may be a larger kitchen, another bedroom, or flexible family space. Set a working budget at the same time.
RIBA guidance places feasibility, site information, budgets, and programmes near the start of a project. An architect or designer may measure the house, review the site, and test possible layouts. Early checks can reveal access, drainage, or alteration issues.
Step 2: Develop the Design
Once the idea looks workable, the design becomes more detailed. The architect usually prepares plans and elevations showing how the extension connects with the house.
This is the right time to decide on room sizes, glazing, roof form, materials, and circulation. Changes are easier before construction begins. The RIBA Plan of Work recommends coordinating architectural, engineering, and cost information before technical design is completed.
Step 3: Confirm the Planning Route
Planning permission is not required for every house extension in England. GOV.UK explains that permitted development rights allow some projects to proceed without a full planning application when set limits and conditions are met.
The Planning Portal notes that previous extensions, height, position, property type, and local restrictions can affect what is allowed. Conservation areas can bring extra controls. If the position is unclear, homeowners can ask the local planning authority or apply for a lawful development certificate.
Planning can cause delays if drawings need changes or more information is requested.
Step 4: Bring in Structural Engineering
Architectural drawings show the intended space. A structural engineer works out how it can safely stand and connect to the existing building.
Calculations may cover foundations, beams, load-bearing walls, roofs, and new openings. Findings can affect the budget. Deeper foundations or extra steelwork may be needed once existing conditions are understood.
Step 5: Arrange Building Control and Neighbour Matters
Most extensions require Building Regulations approval, reports the Planning Portal. These rules cover structure, drainage, walls, roofs, windows, electrical work, and energy performance.
GOV.UK says homeowners can use the local council or a registered building control approver where applicable. A full plans application gives building control detailed information before work proceeds. Site inspections may follow.
Neighbour matters can affect timing. GOV.UK guidance on the Party Wall etc. Act 1996 says some work to party structures, boundary walls, or excavations near neighbouring buildings requires formal notice. Leaving this late can delay the start date.
Step 6: Price the Work and Agree the Contract
With drawings and structural details prepared, builders can price the work more accurately. The Royal Institution of Chartered Surveyors advises homeowners to obtain detailed quotes and confirm the agreed work in writing. Check exclusions, payment stages, dates, and how changes will be handled.
The Federation of Master Builders also recommends allowing a contingency for unforeseen costs. Hidden defects, ground conditions, or changes to the brief can increase the final price.
Step 7: Construction Begins
Work commonly starts with site preparation, excavation, foundations, and drainage. Walls, floors, roofs, doors, and windows follow. Once the extension is weather-tight, internal trades can continue with electrics, plumbing, insulation, plastering, joinery, flooring, and decoration. Homeowners who want the new space to connect more closely with a garden or patio can also consider smart outdoor living features while the main building work is underway. Planning these details at this stage can make them easier to coordinate with the wider renovation.
Delays may happen when materials arrive late, bad weather affects external work, hidden defects appear, or decisions change during construction. Tight London sites can make deliveries and material storage harder to manage.
Regular communication keeps decisions moving. Homeowners should know who manages the site and who can approve changes.
Step 8: Inspection, Finishing, and Handover
Before completion, outstanding defects should be recorded and corrected. Building control must be satisfied that relevant work complies with Building Regulations. GOV.UK explains that completion certification forms part of the building-control process where the work meets the required standards.
Keep approved drawings, structural calculations, warranties, certificates, and product information. These records may help with maintenance, future alterations, or a later sale.
Pre-Construction Checklist
- Confirm the total budget and keep a contingency for unforeseen work.
- Agree the construction schedule and decision deadlines.
- Confirm planning, Building Regulations, and Party Wall requirements.
- Plan site access, deliveries, skips, and material storage.
- Check what the contract price includes and excludes.
- Choose one clear point of contact.
- Record design changes, costs, and approvals in writing.
A home extension is easier to manage when key decisions are made before work reaches site. Good preparation cannot prevent every surprise, but it can reduce avoidable delays, unexpected costs, and rushed choices during construction.